12 DIY Wardrobe Ideas
Building your own wardrobe is a rewarding project that allows you to create custom storage tailored to your space and style. With the right materials, tools, and a bit of creativity, DIY wardrobes can rival high-end custom designs at a fraction of the cost. From simple open shelving to elaborate built-ins, here are twelve DIY wardrobe ideas to inspire your next project.
1. IKEA PAX Hack with Crown Molding
The IKEA PAX system is a favorite for DIYers because of its modularity and affordability. Transform a basic PAX wardrobe into a custom built-in by adding crown molding at the top and baseboards at the bottom. Fill gaps with caulk and paint the entire unit to match your walls. The result is a seamless, built-in look that costs a fraction of custom cabinetry.
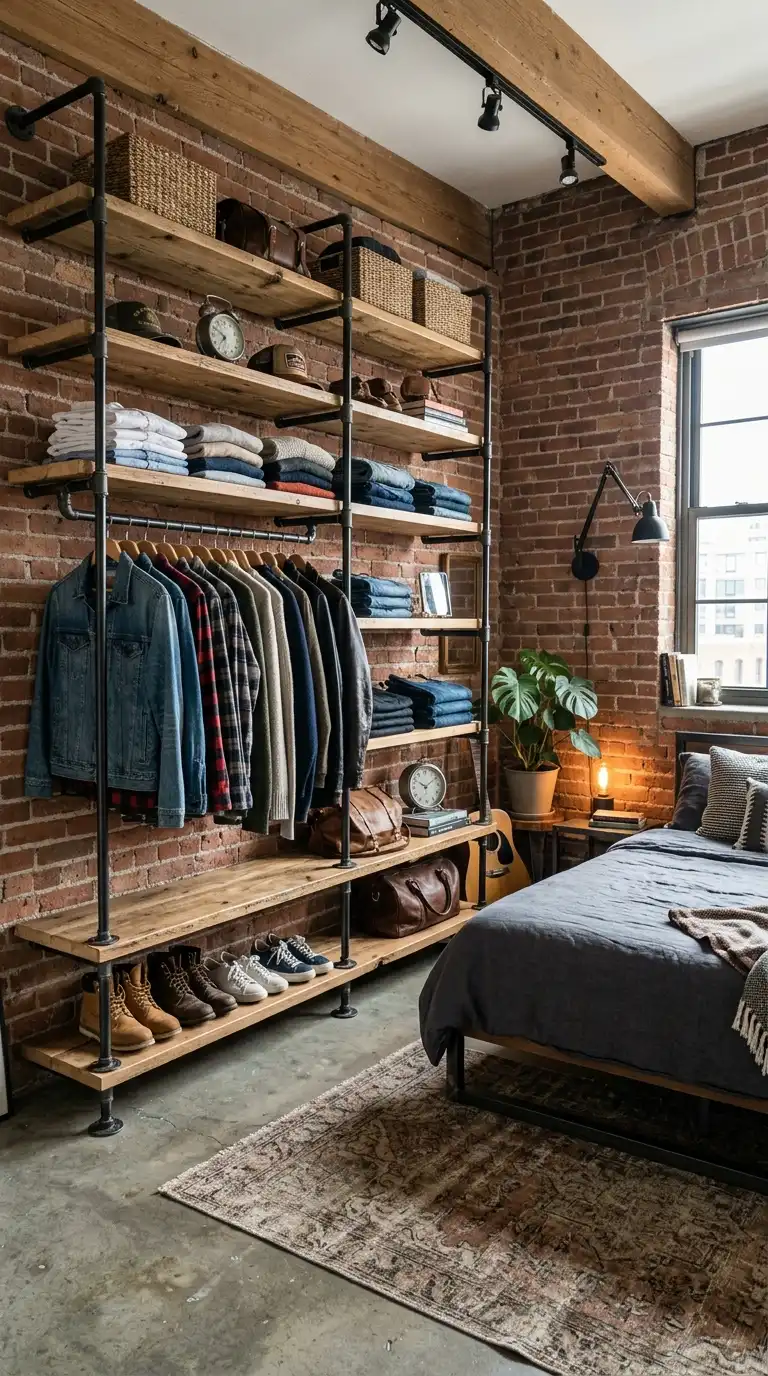
2. Open Wardrobe with Pipe and Wood
Create an industrial-style open wardrobe using black iron pipes and wooden boards. Assemble a frame with pipes and fittings, then add wooden shelves and a hanging rod. This DIY project is customizable to any size and offers a rugged, urban aesthetic. Use pine or oak boards for the shelves, and finish with a protective sealant.
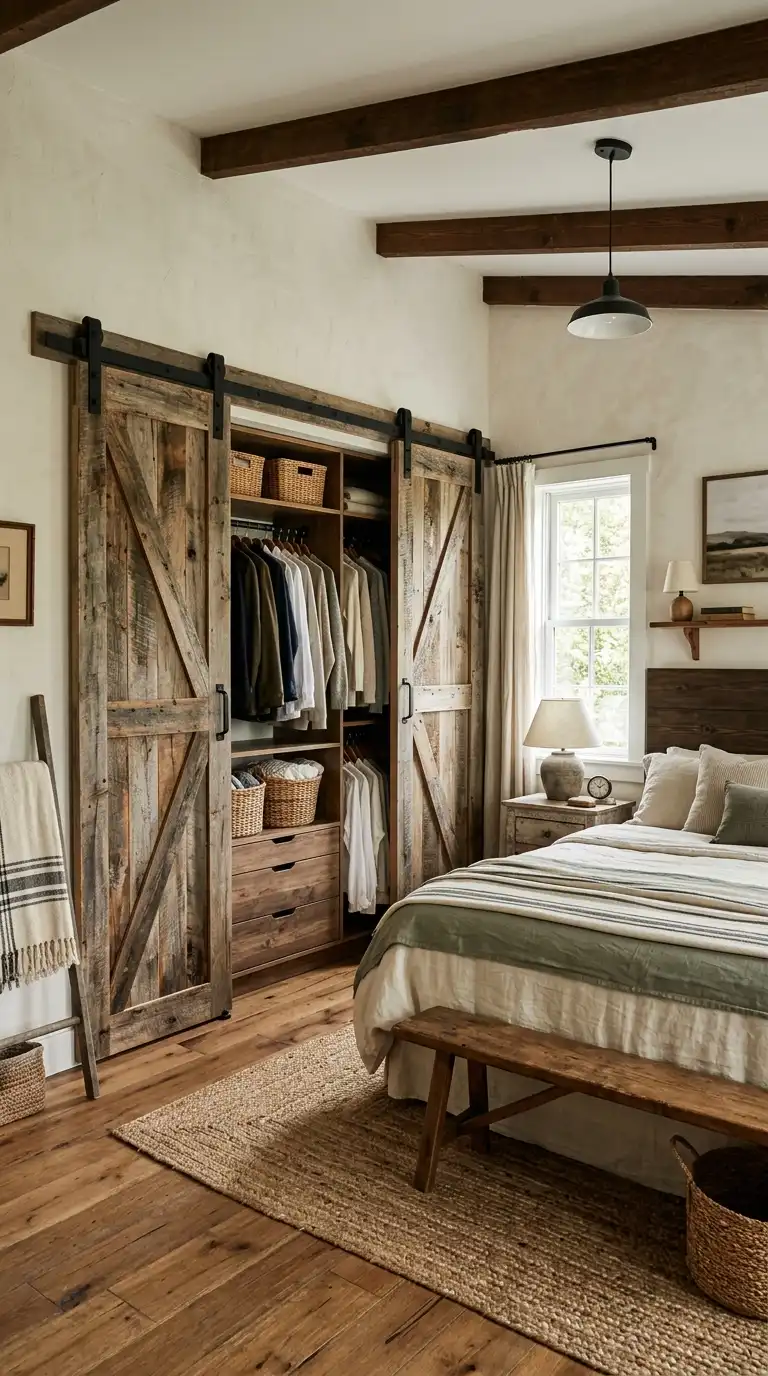
3. Wardrobe with Sliding Barn Doors
Build a wardrobe with sliding barn doors for a rustic, farmhouse look. Construct a simple frame from plywood or MDF, then build or purchase sliding barn doors that run on a track. Choose reclaimed wood for the doors for added character, or paint them in a bold color. The sliding mechanism saves space and adds visual interest.
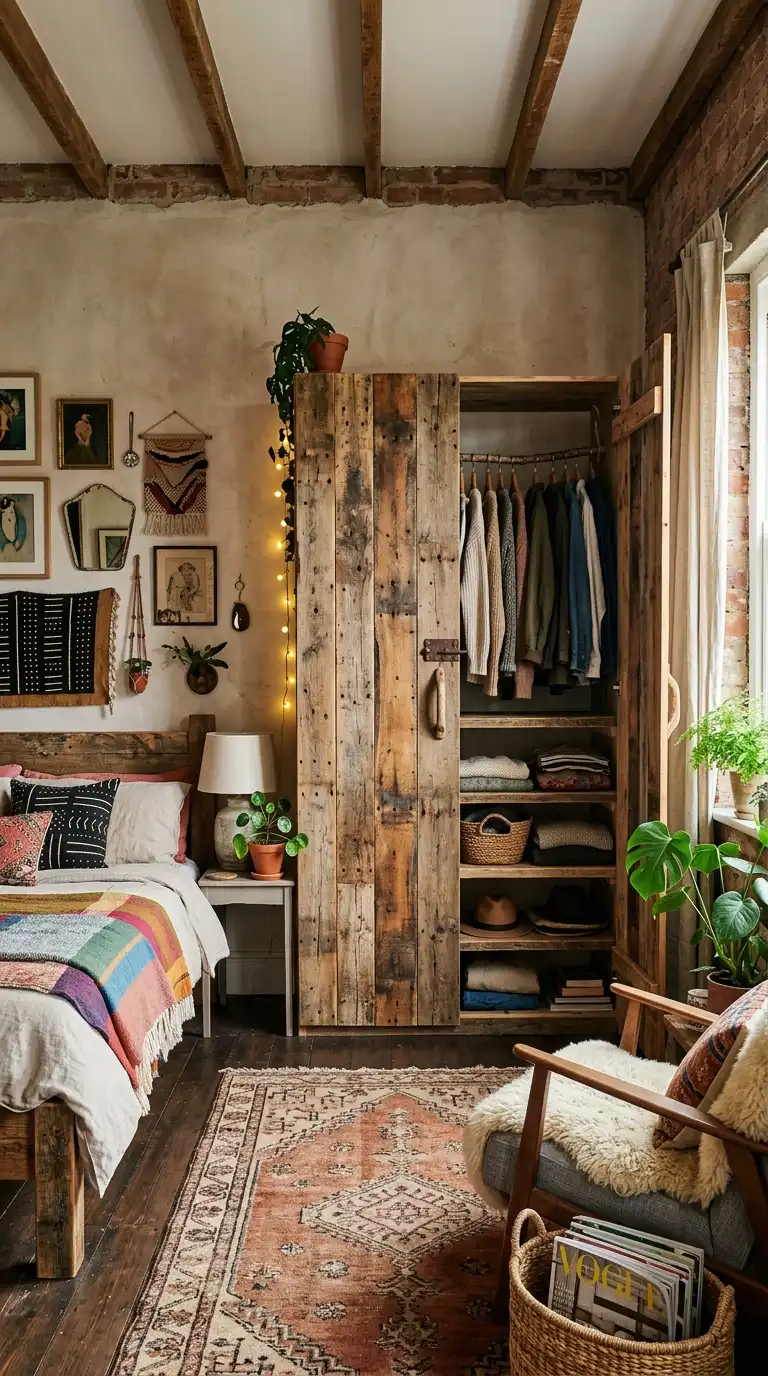
4. Reclaimed Wood Wardrobe
Build a wardrobe entirely from reclaimed wood for a unique, sustainable piece. Source old pallets, barn wood, or salvaged lumber, and assemble a simple frame with shelves and a hanging rod. The natural variations in wood grain, color, and texture create a one-of-a-kind piece that adds character to any room.
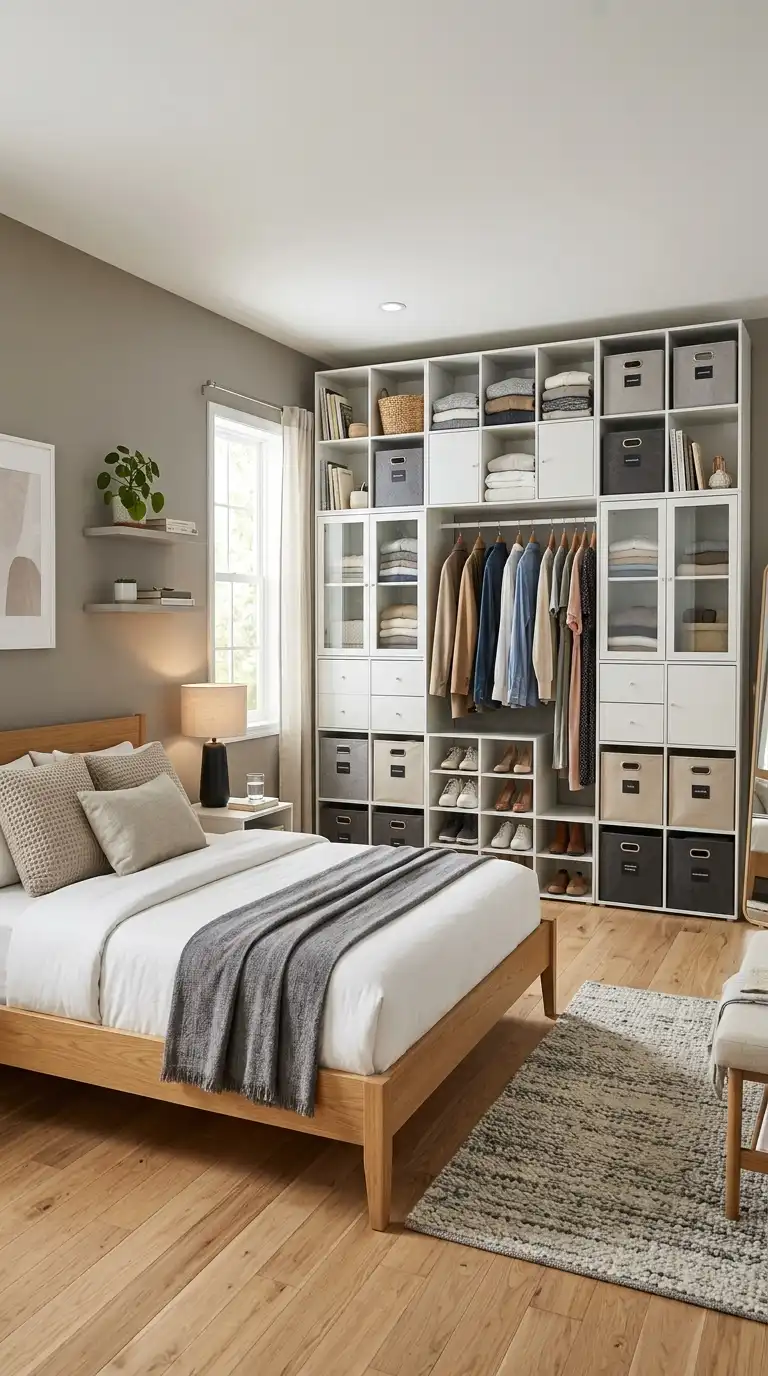
5. Modular Cube Wardrobe
Create a modular wardrobe using cube storage units like IKEA KALLAX. Arrange multiple cubes in a configuration that fits your space, and add doors, drawers, or baskets to customize the storage. This DIY project is simple, affordable, and easily reconfigurable as your needs change. Use the cubes for folded clothes, shoes, and accessories.
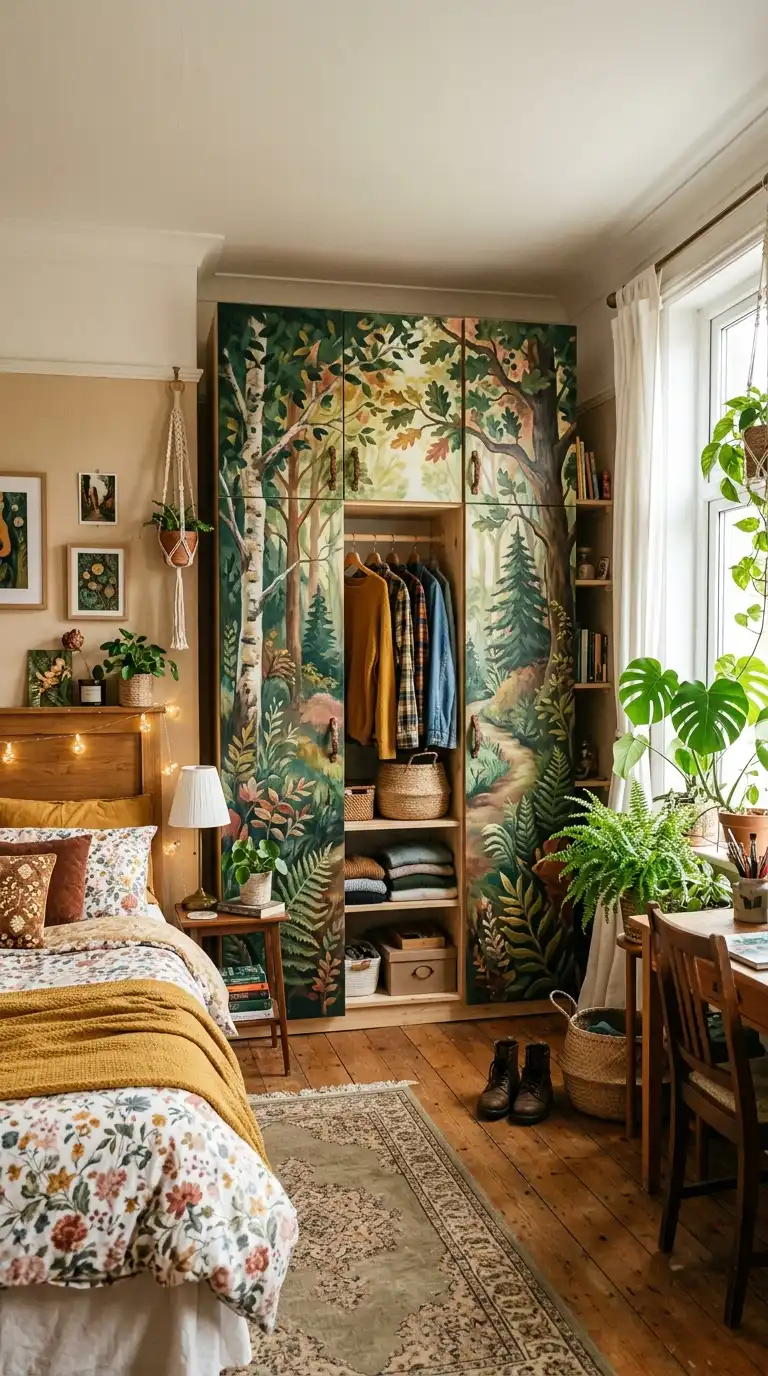
6. Wardrobe with Painted Mural
Give a plain wardrobe a unique personality by painting a mural on the doors. Use stencils, freehand painting, or decals to create a design that reflects your style—whether geometric patterns, botanical motifs, or abstract art. This DIY project is an affordable way to make a statement piece that no one else will have.
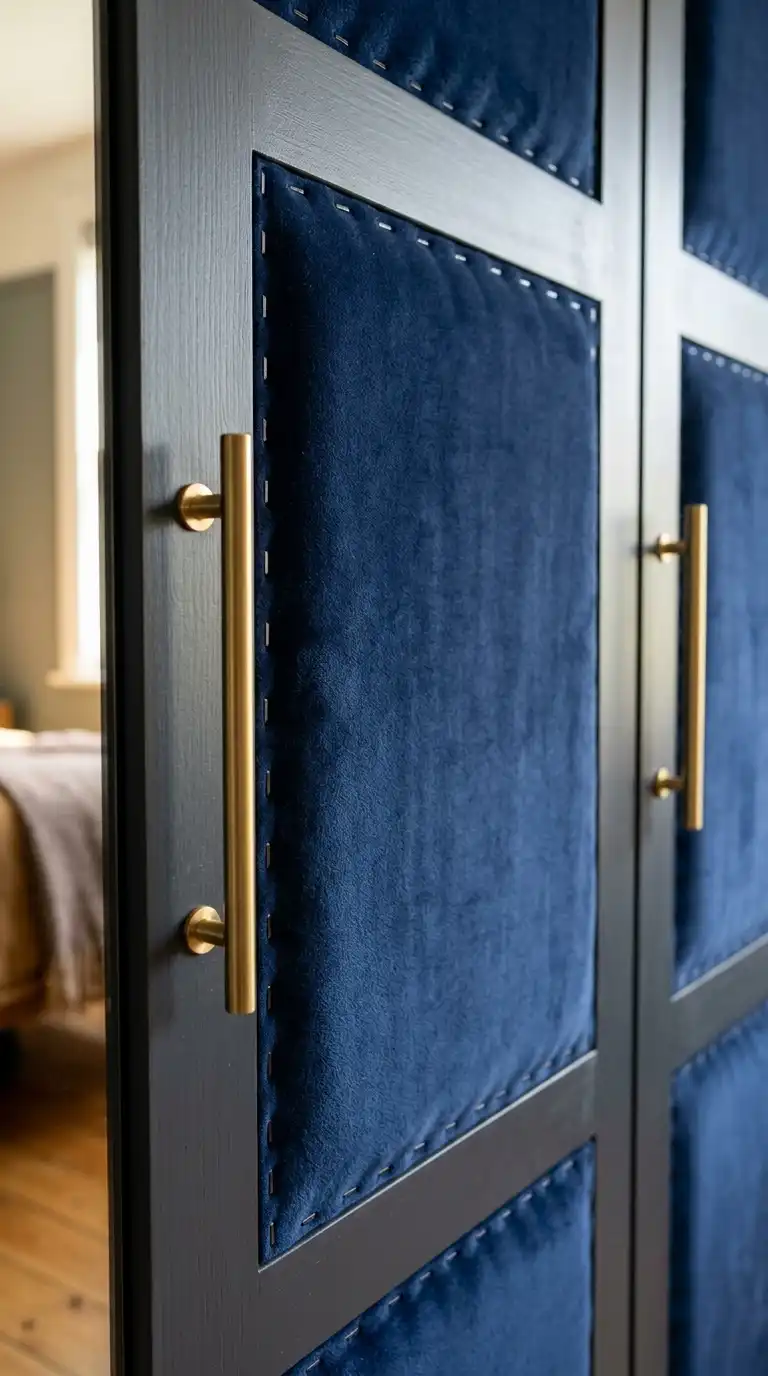
7. Wardrobe with Fabric-Covered Doors
Update plain wardrobe doors by covering them with fabric. Choose a fabric that complements your decor—linen for a natural look, velvet for luxury, or a bold pattern for a pop of color. Stretch the fabric over the door panels and secure with a staple gun, or use fabric glue for a no-sew option. This DIY project is reversible and easy to update.
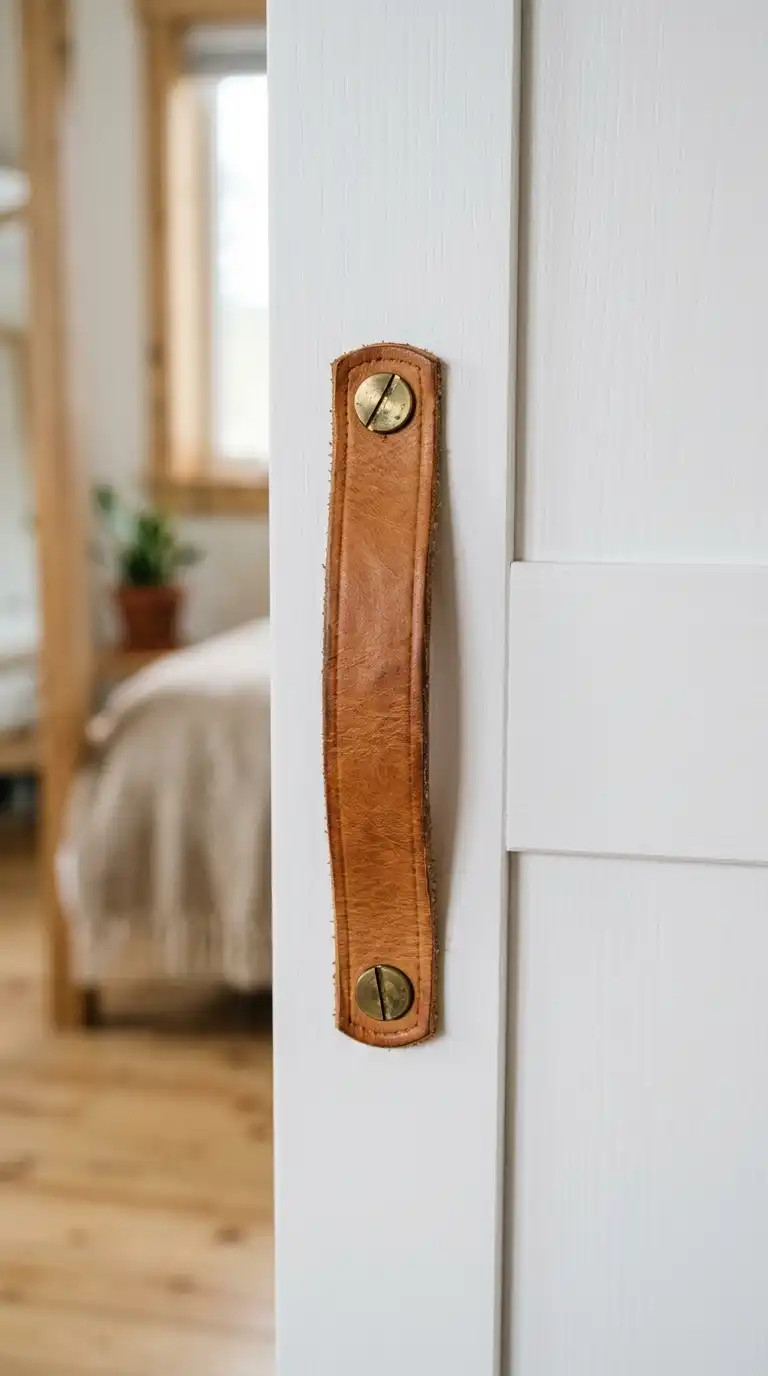
8. Wardrobe with Leather or Rope Handles
Swap standard hardware for DIY leather or rope handles. Cut leather strips to size, punch holes, and attach them with screws to create minimalist, organic pulls. For a nautical look, use rope or cord tied through drilled holes. This simple upgrade adds a handcrafted touch to any wardrobe.
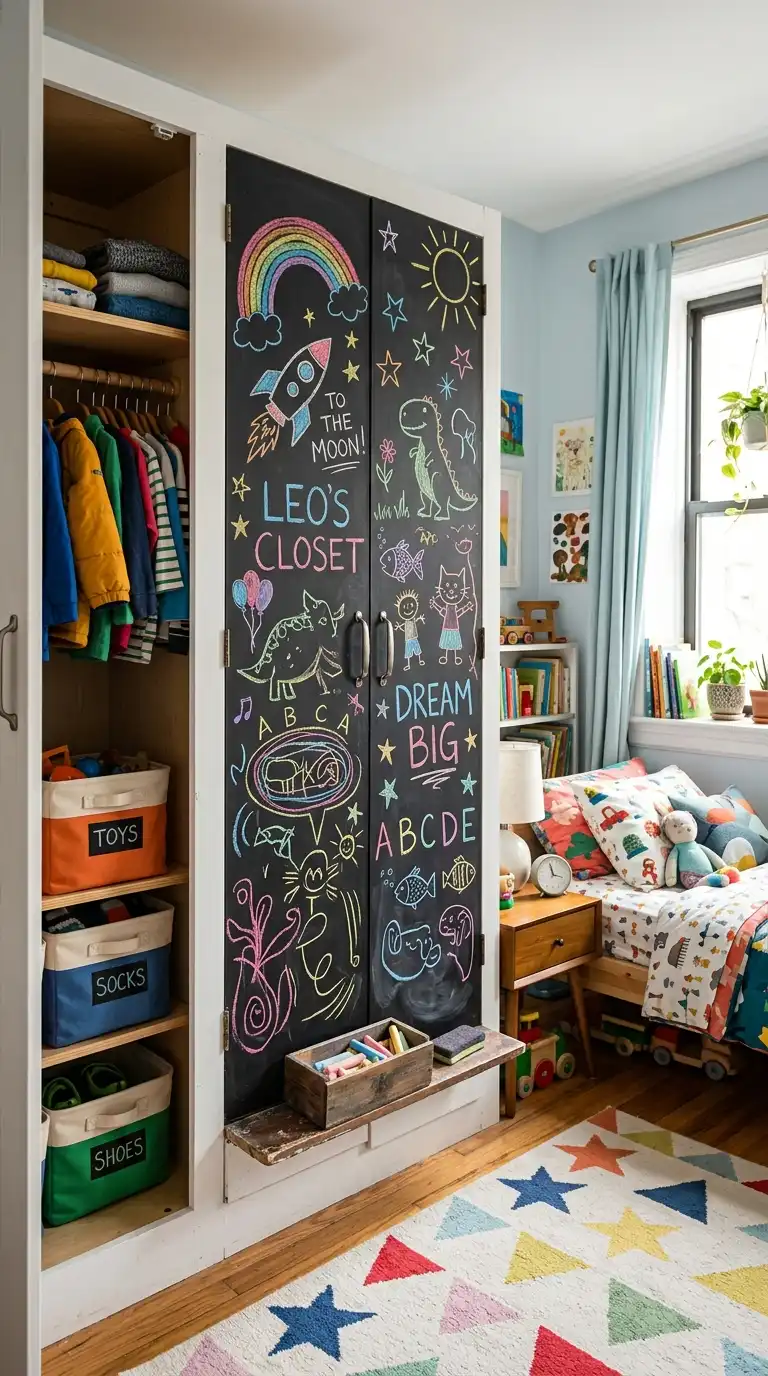
9. Wardrobe with Chalkboard Paint Doors
Paint wardrobe doors with chalkboard paint to create an interactive surface. This is a fun DIY project for children’s rooms, allowing kids to draw and write on their wardrobe doors. Use a few coats of chalkboard paint, and include a small ledge for chalk. The doors can be wiped clean for endless creativity.
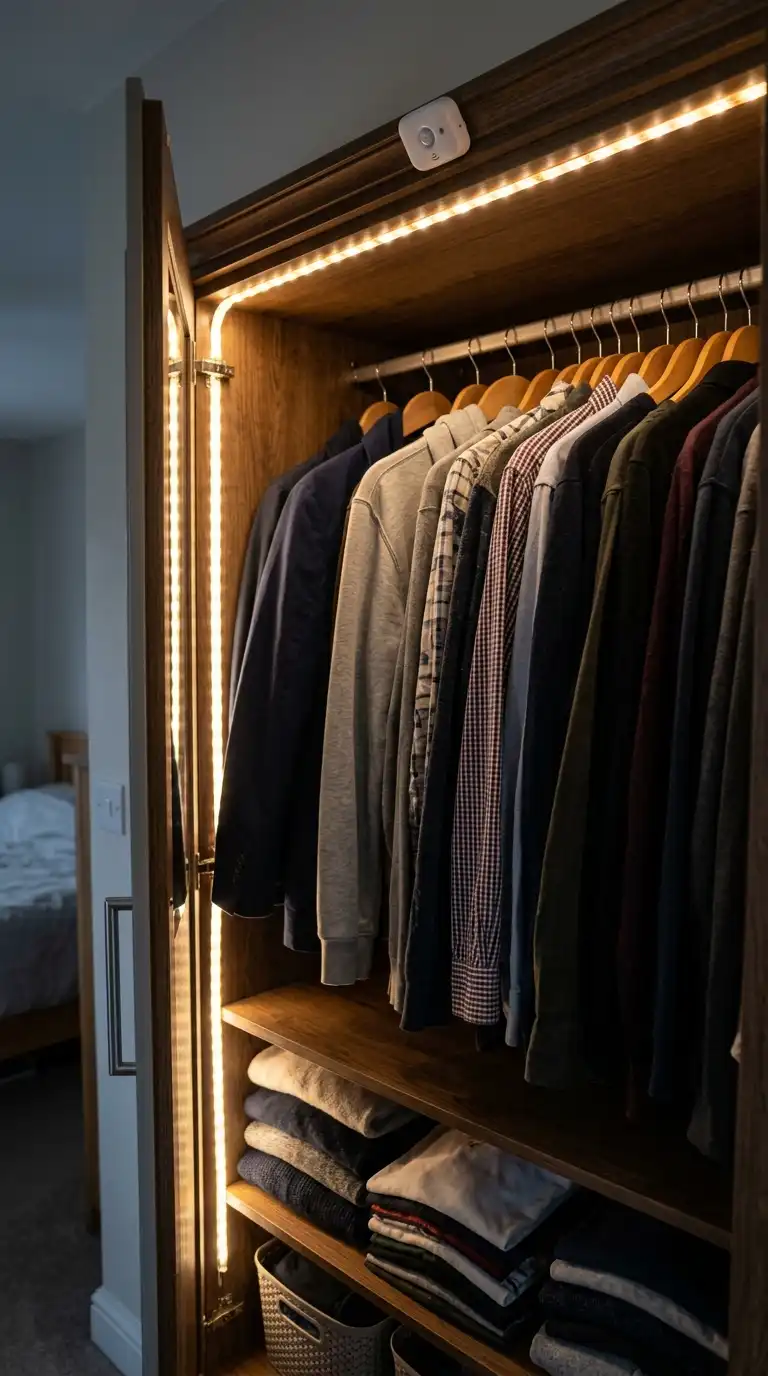
10. Wardrobe with Recessed LED Lighting
Add integrated LED lighting to an existing wardrobe for a quick DIY upgrade. Install adhesive LED strip lights along the top edge of the wardrobe or inside shelves, connected to a motion sensor or switch. The lighting adds ambiance and makes it easier to find items. This project requires basic electrical knowledge or battery-powered options for simplicity.
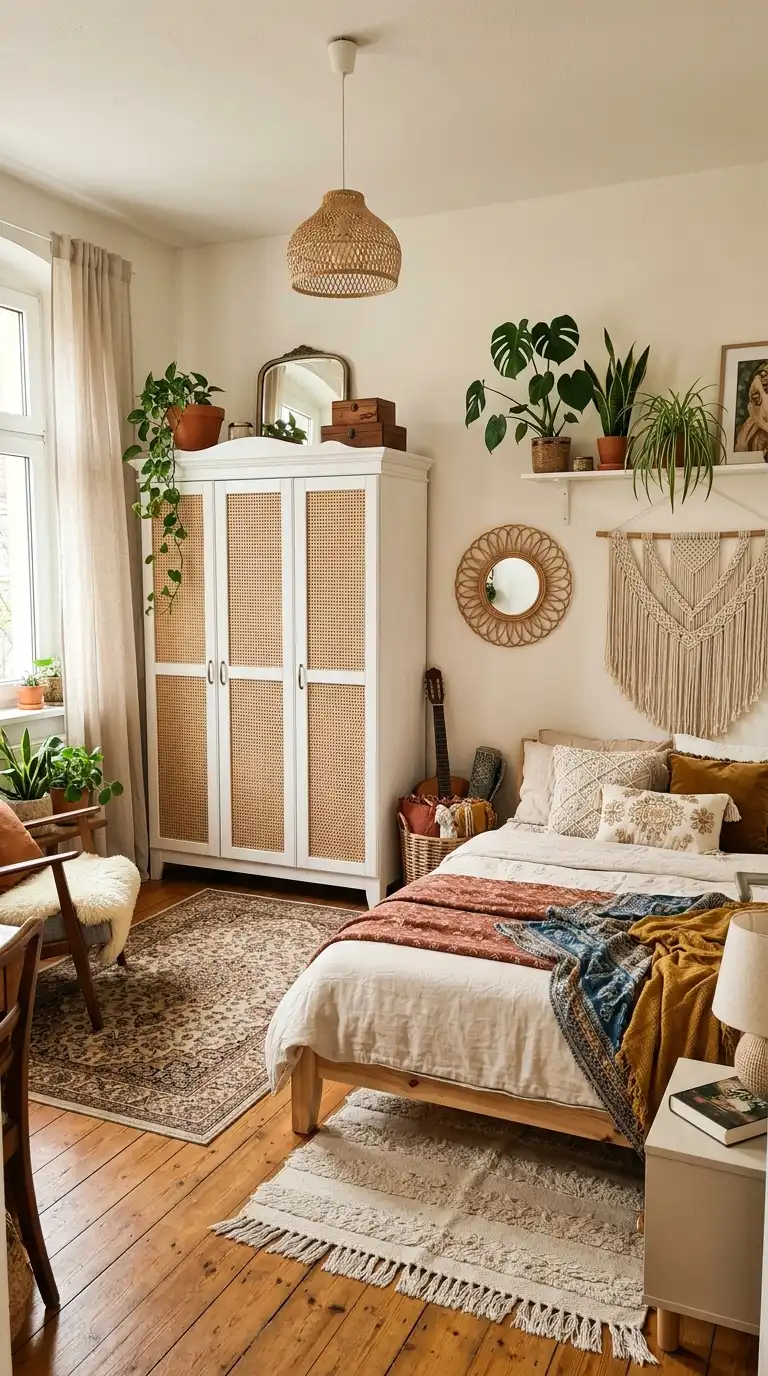
11. Wardrobe with Woven Cane Inserts
Add cane webbing to plain wardrobe doors for a textured, boho look. Cut out sections of the door panels, then staple or glue cane webbing into the openings. This DIY project requires a jigsaw for cutting and patience for securing the webbing. The result is a custom-looking wardrobe with natural texture.
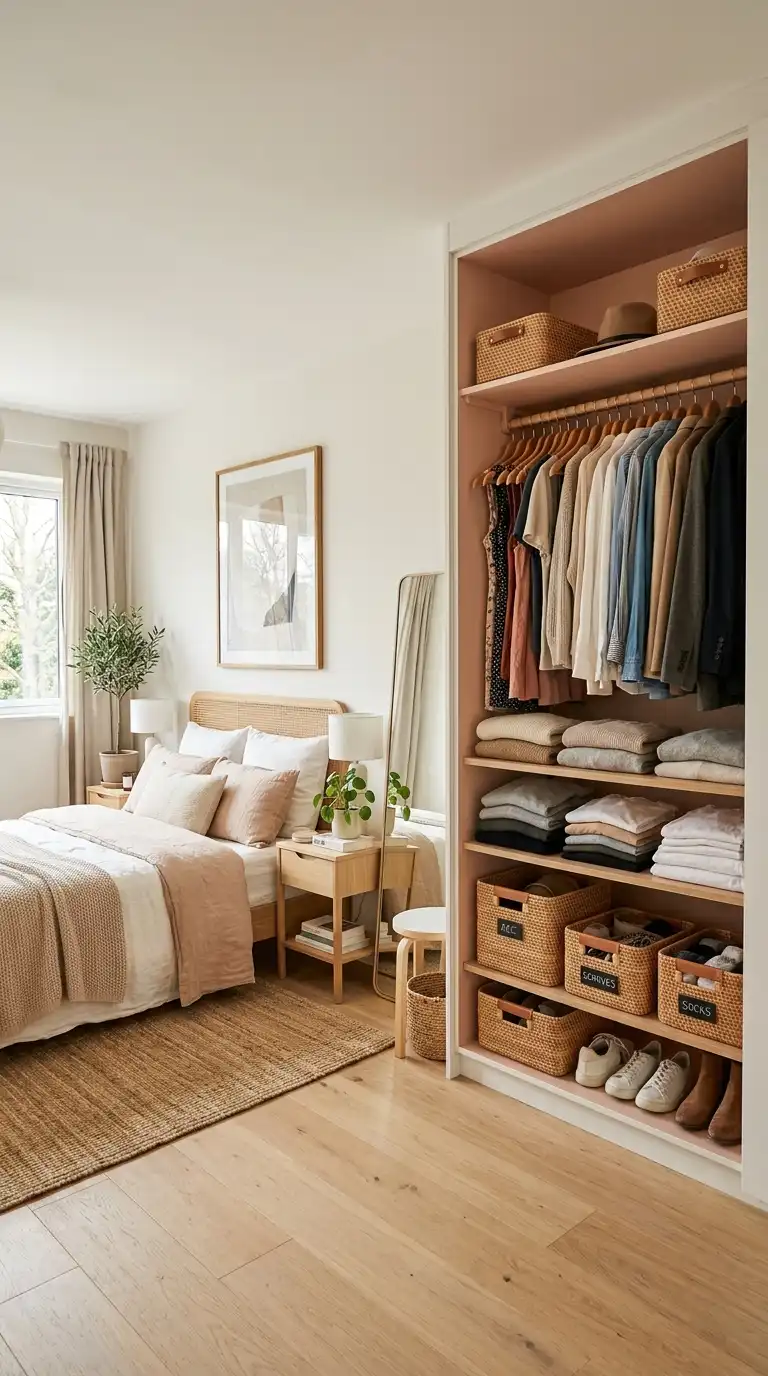
12. Wardrobe with Open Shelving Conversion
Convert a standard wardrobe into an open storage system by removing the doors. Add shelves, baskets, and uniform hangers to create a curated, boutique-style display. This simple DIY project can transform a dated wardrobe into a modern, open storage solution. Use paint or wallpaper to update the interior for added style.
Frequently Asked Questions
- What tools do I need for a DIY wardrobe?
Basic tools include a drill, saw (circular or jigsaw), measuring tape, level, screwdriver, and sander. For advanced projects, you may need a nail gun, router, or pocket hole jig. Always prioritize safety with appropriate gear. - Can I build a wardrobe without advanced woodworking skills?
Yes. Many DIY wardrobes use modular systems like IKEA PAX or cube storage as a base, with modifications like added molding, paint, or hardware. Simple open wardrobes can be built with basic tools and pre-cut wood boards. - What materials are best for DIY wardrobes?
Plywood is strong and versatile. MDF is affordable and takes paint well. Reclaimed wood adds character. For budget projects, IKEA systems provide a solid foundation. Choose materials based on your skill level and desired aesthetic. - How do I ensure my DIY wardrobe is sturdy?
Secure the wardrobe to the wall to prevent tipping. Use quality hardware and reinforce joints with glue and screws. For floor-to-ceiling designs, ensure the frame is level and securely anchored. Follow manufacturer instructions for modular systems. - How do I finish a DIY wardrobe for a professional look?
Fill all gaps with wood filler and sand smooth. Apply primer before painting for a smooth finish. Caulk seams between the wardrobe and walls. Use quality paint or sealant, and install hardware with precision. Attention to detail in finishing makes the difference between DIY and professional-looking results.